- Home
- About Kite Repairs
- Start Kite Repair Service
- Kite Repair How To
- Contact us
Kite Repair How To
WindFire Designs
- How to kite repair
- Thoughts on kite repair
- High-tech fabric degradation
- Paraglider repair
How to do adhesive-based kite repairs — DIY
by: Tim Elverston — founder of WindFire Designs and our repair service.
We see a lot of kites that come in with repairs that are done at home, or even on the beach or field.
I wanted to compile the recommendations that I make to people that do this themselves.
Kite repair methods, materials, and advice:
Things to remember when the damage happens:
• Don't remove any cloth at all. If you need professional repairs, or if you are doing them yourself, keep every shred of cloth intact. Even if the fabric looks terrible, every little piece of cloth is like forensic information that will help whomever repairs the kite to restore the shape perfectly.
• Take the pressure off immediately. If you see damage after a crash, take the pressure of the lines instantly or as soon as you can safely. We know this seems obvious, but all too often we hear of damage getting worse seconds after the kite has crashed from a regretful pilot who says they should've unhooked. This goes against your monkey reflex to hold on.
• Don't continue to fly a damaged kite. We are kite fliers too, and we get that many times you want to finish the day even though your kite is ripped. Unless you are absolutely sure that the damage is insignificant, it is always best to err on the side of caution. Almost all of the huge rips we see show evidence of having started from a tiny rip - usually a laceration from sliding over something sharp. Water is a devious substance with huge force behind it. It will find a tiny rip and exploit it instantly.
• Decide if it needs sewing. Now, I own and run a kite repair business, so please take this with a grain of salt if you like - I sew absolutely everything. It's far far sweeter to have it locked down. With a lockstitch machine [typical sewing machine], every stitch is almost like a rivet, which you see on every single aircraft anywhere. However, I am very busy repairing kites as it is, and I don't try to talk people into work they don't need me to do.
Where is the damage?
If your damage is on an area of fabric that is supposed to hold a pressurized bladder (on the leading edge or struts) it needs to be sewn.
If it is over 6-8 inches long, or is near the leading edge, it needs to be sewn.
It's almost that simple. There are a very few exceptions on the leading edge with tiny damage that you can stick repair cloth behind (between the inflated bladder and the LE cloth) by reaching inside the leading edge tube. See surface prep advice below. On the LE, if your rip over 3 mm then it's a real good idea to sew it. Like water, air pressure is devious and it will be trying to fail that adhesive-only patch forever and constantly working on creeping your adhesive which will form a bulge. The more it bulges the weaker the margin of that bulge becomes.
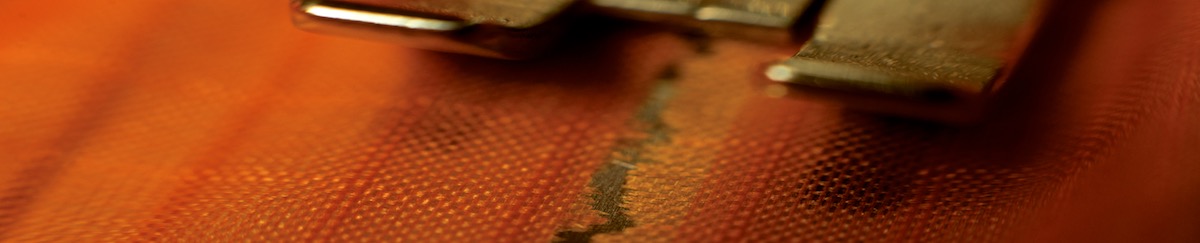
Score Marks
Micro cuts that don't go all the way through
Score marks that break fibers are very common and they should definitely be sewn asap. Damage on the LE is much more a matter of when, not if, the LE will fail. It's much cheaper to get the repair done before your bladder blows up.
Never ride on a kite that has a major rip in the LE fabric that has been fixed with adhesive only! It's just plain unsafe to go out in the water this way. Send them to a good repair shop, you won't regret it. We are going to recommend our service here : ).
Adhesive patches on the sail
Adhesive-only patches on the sail are much the same protocol. If they are within the first third of the kite, I mean from the leading edge back, then it's probably a good idea to sew them. The reason these kites look so smooth in flight is because they are loaded very evenly and loaded hard.
Any weakness in this sail membrane will be exploited and can become huge damage. There are some adhesive-only patches that we see in less-loaded areas of the kite that you can kind of tell will last forever without incident.
I'd say that if your damage is clean-edged and under about 6 inches, and is in a low load area of the kite, you might be ok. Follow the surface prep advice below. There is a kit available that I think works pretty well. It's called kitefix, and I would say that it's probably an ok system. Like anything someone is selling you, it's going to be made to sound ever-so-simple and it might be simple and great be for small damage. For large damage, it might be ok too, but its success is really going to hinge on you. Keep the edges absolutely flat and perfectly aligned!
Making an adhesive-based (non sewn) kite repair yourself:
Choose your repair tape wisely.
• Tear Aid Type A
Available here at www.kitebladder.com [use his contact info and ask Jim Haddox directly about the product]
Tear Aid Type A is an intense vinyl patch used for rafts and also now used for kite bladder repairs and some kite fabric repairs. The adhesive is great, and is so intense that it's sometimes difficult to get off of its own backing material. It's very strong and is clear, so there won't be real visual impact on your kite.
Pros: Versatile and strong adhesive. It makes for a strong repair in either a bladder or kite fabric.
Cons: Not fibrous - meaning it can stretch, so isn't well suited to areas that are subject to high loads [leading edges] or areas that have very long rips. Being not fibrous also means that it is not a good candidate if you plan to sew it afterwards.
• Typical repair cloth
This is the ripstop variety, and is really only ok in small doses. This is the relatively thin cloth tape that is sold at camping stores and is included with many kites as a repair option. If you're not sure what you have, look for a clearly visible grid pattern [the ripstop] of reinforcement yarns. This stuff is often either a color, or a sort of raw nylon type of translucent or clear.
Pros: It has a very aggressive adhesive, it is cheap and can be found in camping stores. In the short term, it can make a stronger bond than insignia cloth if you are not planning to sew it.
Cons: It is not very strong, which is a surprise given that it seems so sticky. It is really excited to attract sand and this is a huge problem in my opinion. The edges peel up and gather more sand which is abrasive and will short-life the cloth at the margin of your patch. It is also difficult to reposition once it touches the kite which means that wrinkles are often trapped and these are then weak points in the kite. Perhaps the second biggest con is that if you ever have to remove the patch, which we always do when we see this stuff come in, it leaves behind a terrible residue that wants to stick to everything, the kite itself, our sewing machine table and parts, ick! In short, we do not recommend it.
• Self adhesive dacron
Dacron is actually polyester. It currently seems to be the fabric of choice that manufacturers include with new kites these days. It is a great cloth, just fantastic stuff. It does not have a ripstop pattern in it, all the fibers are the same, and it's very smooth. You have sticky dacron on your kite everywhere, you'll see it reinforcing seams, strut to LE junctions, tow points, various terminations, just all over. In the short term, the adhesive is not always really aggressive, it needs some time and sun or heat to set in properly, so it's not always great for slap and go type repairs as it should be allowed to sit, unloaded, in the sun before use.
Pros: It is strong. The adhesive and paper backing system is excellent. For the long term, the adhesive is unbeatable. For a do it yourself kite repair it is great stuff because it can easily be repositioned if it has not been pressed down on yet. This means you can get a good and totally flat patch. It is specifically mildew resistant, and UV resistant. The edges don't peel up if you lay it down without wrinkles. It doesn't gather sand. If it ever has to be removed before a professional patch is done, it almost always comes up without residue - praise the wind gods.
Cons: Not many come to mind. The area needs to be prepped properly for this stuff's adhesive to get full strength. I'll cover this more below. It doesn't come in huge range of colors, which can be annoying for some folks. Generally I find that these kites are not particularly beautiful to begin with. However, the lack of color selection is never a problem if it is used correctly. Black always looks awesome, as does white. Many colors are indeed available however, blue, red, hot yellow, gold, green, orange, and grey.
• Branded adhesive-based Kitefix repair kits
Be careful. These use permanent adhesive. You will be locking down whatever you do forever in your kite. We can try to deal with it later with no guarantees. The adhesive comes from a tube and it is real intense. It won't be coming off - so, successful or not it's a commitment.
Pros: Quick, strong.
Cons: Traps wrinkles, it's ugly as sin, cannot be removed if an error in layup is made. It's also messy, and perhaps the biggest problem is that it does not stretch in the same way that the rest of your kite does naturally.
Prepping your fabric surface:
This is the most important part of using any adhesives anywhere in life.
Surface prep:
If you think that your damage is small enough that it doesn't need to be sewn, (straight rips under about 6 inches in a low-load area of the sail) then this applies. If you personally plan to sew it afterwards, it is not nearly as important. To start, remove sand, and wash the kite with at least water all over. Let it dry completely. Not only does water mess with the action of an adhesive, cloth changes dimension when wet.
Once dry, use alcohol on the surrounding area first. I mean real alcohol, like from a paint store - denatured grain alcohol, not isopropyl rubbing-your-back stuff. Put it on a clean paper towel and just wipe it on and wipe it off several times. Get the whole area that you foresee contacting your adhesive. Once you do this, avoid touching the cloth in that area. Now is a great time to wash the hell out of your hands.
Line up your edges — flat flat flat!
There are a few ways to do this, and it will depend on where your damage is as to how you decide. We have our own methods that don't really apply to the type of repair I'm describing here. The guys over at fixmykite.com have a whole video about how they do their professional repair - they use a sticky bench top. There are some good tidbits in there I suppose, you can hear how awesome they are. Of course I'm going to recommend here that you use our service instead, but I figured that I'd give them a nod anyway. They are good people.
So work out a way to line up the edges. I'd use a stool or a small table. Let the rest of the kite fall away from the area you're working on. You could make the surface sticky somehow.
Temporary masking tape — process aid
Perhaps the best way to make sure your edges are lined up and flat is to use masking tape first on the opposite side first. Masking tape, maybe even the good blue stuff, is great. It's non-committal and cheap. Try several times if you need to - this is why you're using masking tape here. Get your edges to line up dead-on! Stick the masking tape on one edge of the rip first.
Don't stretch the cloth as you go. Just lay it down without tension. Once you have the masking tape on one edge, go back and stick the other edge of cloth down lining it up as you go. Watch for clues that you're doing this accurately - graphics, ripstop pattern, and stray fibers all help.
All lined up and ready to stick
Ok so we're assuming that your edges are lined up and flat now. Good patch cloth comes on a paper backing. Work out how much you need and cut it to shape. I round nearly every corner. This helps it not peel up. Inside right angle corners clearly don't curve well, but we also don't recommend doing L shaped rips with adhesive-only methods.
Make your patch cloth about 1 inch over the rip on both sides and at the ends. Don't go less than that. This makes your patch probably about 2 inches wide and hang off the end by an inch.
You've lined up your edges with the aforementioned method. You've cleaned your area with proper alcohol several times. You've avoided touching it since it was cleaned. You've cut your cloth to shape. You've washed your hands.
Time to lay it down:
Pick up the corner of the patch cloth with the back of your fingernail. Leaving it mostly on the paper backing. Fold the paper backing under, thus exposing the adhesive at the end of your patch for about two inches. Before touching this to your kite, line it up with your rip and put the damage right in the middle. You can do this by setting the patch down on the kite and allowing only the paper backing to contact the kite. You'll have a tongue of exposed adhesive at one end.
Don't press the sticky part down until you're sure it's lined up. Then touch the adhesive down lightly at the exposed end. Lift the back of the patch up once you've tacked the end down and start to remove the rest of the paper. Again, don't touch the adhesive, or where it's about to stick.
As you lay the cloth down, let it mostly do the falling into place. It's flat, and it wants to lie down flat. If you see it trapping a wrinkle, lift it up and try again—now, not later is the time to avoid wrinkles, they don't come out well at all once the patch is down. Reposition it only with the paper backing still in place where you are pulling from.
Coefficient of elasticity differs!
Your kite and the fabric you're using to repair it with might have different stretch characteristics. You can only compensate for this so much, and then you have to just roll.
Don't stretch the cloth as you lay it down. You want the kite and the patch to be at the same mild tension—just enough to take the wrinkles out, not more. Save your paper backing to make a mirror opposite patch to go on the other side.
When you're done, and you're happy with the flatness, burnish it into place. You could use the back of a spoon against a hard table. Don't go too crazy, but give it a good pushing on.
Remove the crutch of masking tape
If you plan to not sew the repair, then double side it!
Now remove your masking tape that's on the other side. Use the scrap of paper backing from your adhesive repair cloth to make a mirror-opposite patch for the other side.
Use the same methods for getting it flat as above. If you have a glass table, put a light under it, you'll see the other side very clearly that way.
Signing off
May excellent adhesion be with your fabrics
I hope this guide has been helpful. Let me know in email if you want to add to, or have problems with this guide. Thanks and happy kiting. And of course, if you've decided that you want a sewn kite repair for one reason or another, we will be very happy to get your business.
Because we're sewing our kite patches, they don't rely on adhesive alone. We make them very narrow and we think they look really sharp. Also, they are not double sided. I could write an obnoxiously huge textbook on sewing, and I may add tips for sewn repairs here as well. For now, I hope this helps. Just remember, it is possible to make a good repair with adhesive alone.
Best winds,
Tim Elverston
- How to kite repair
- Essay on kite repair
- About high-tech fabric breakdown
- Paraglider repair

WindFire Designs
Kite repair service in a few easy steps
How to have your kites serviced
by WindFire Designs:
1: Print or fake our WindFire Designs Repair Ticket
2: Allow the kite to dry and shake off loose sand
3: View our checklist
4: Pack the kite in a smallish box
5: Ship to WindFire Designs

To all our customers, Thank you.
All content on the WindFire Designs domain is © 2000 — © ∞